192.168.100.1 Login Admin – Access & Configure Router 2026


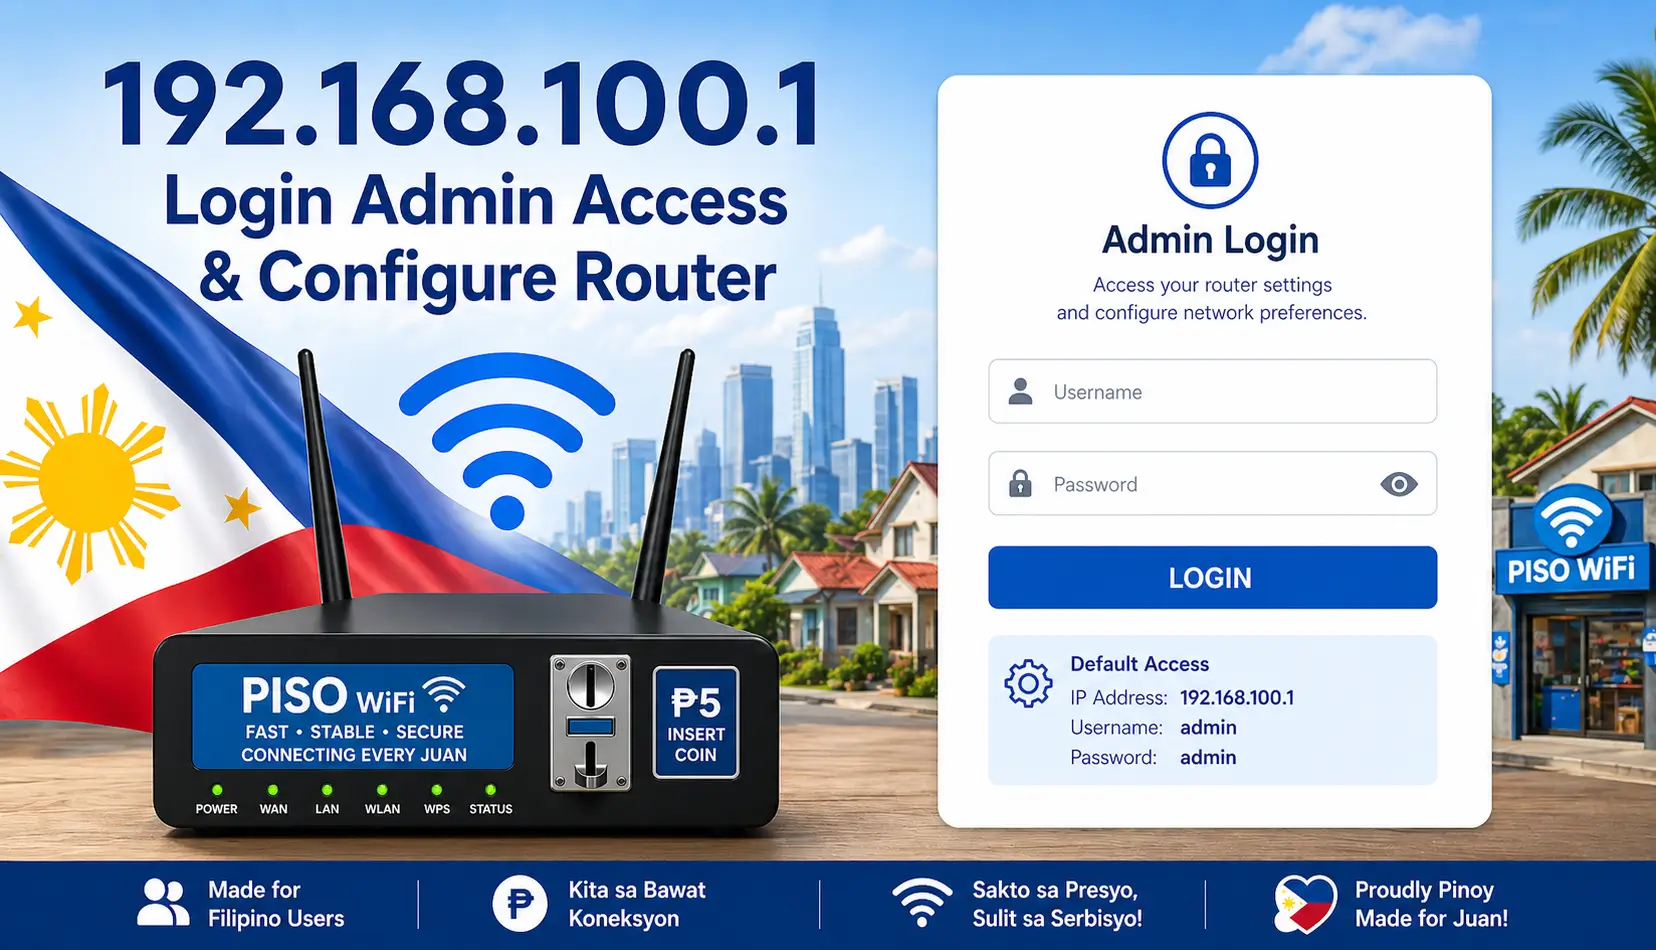
192.168.100.1 — Router Admin Login
Access your router's admin panel quickly and easily
| Field | Value |
|---|---|
| Default IP Address | 192.168.100.1 |
| Version | Router Admin Panel |
| Username | admin |
| Password | admin |
| Category | Router Login |
| Alternative Login | user / password |
| Last Update | Recently Updated |
- 1Make sure your device is connected to the same Wi‑Fi network as the router.
- 2Open your web browser (Chrome, Firefox, Edge, etc.).
- 3Type 192.168.100.1 in the address bar and press Enter.
- 4Enter your username and password. Try admin / admin if you haven't changed it.
- 5You are now in the admin panel! You can change Wi‑Fi name, password, and other settings.
Walking into router management for the first time can feel like stepping into a foreign language, but it is simpler than it looks. The 192.168.100.1 IP address is your gateway to taking full control of your home or office network and once you know how to use it, everything else falls into place naturally.
This guide covers everything from logging in for the first time to configuring advanced settings, written in plain English so anyone can follow along without needing a networking background.
Disclaimer
This website is created for educational purposes only, and all content is originally written by Arif Khan nothing is copied from any source. We are not affiliated with any brand or company mentioned here. If you have any concerns, please contact us directly before taking any legal action.
What Is 192.168.100.1?
192.168.100.1 is a private IP address used by routers as their default gateway. It lives inside your local network, invisible to the public internet, and acts as the control center for everything connected to your Wi-Fi. Manufacturers like Ambit Microsystems, Motorola, Ubee, Arris, Askey, Lenovo, Netronix, Planet, SmartRG, and ZyXEL use it as a standard admin access point.
Unlike a public IP which changes every time you reconnect to the internet this private address stays fixed. Every device that connects through your router gets its own assigned address in sequence: 192.168.100.2 for the first device, 192.168.100.3 for the second, and so on.
The router uses NAT (Network Address Translation) to bridge the gap between your private network and the public internet, remapping your private address space so your data can travel freely online.
192.168.100.1 IP Address
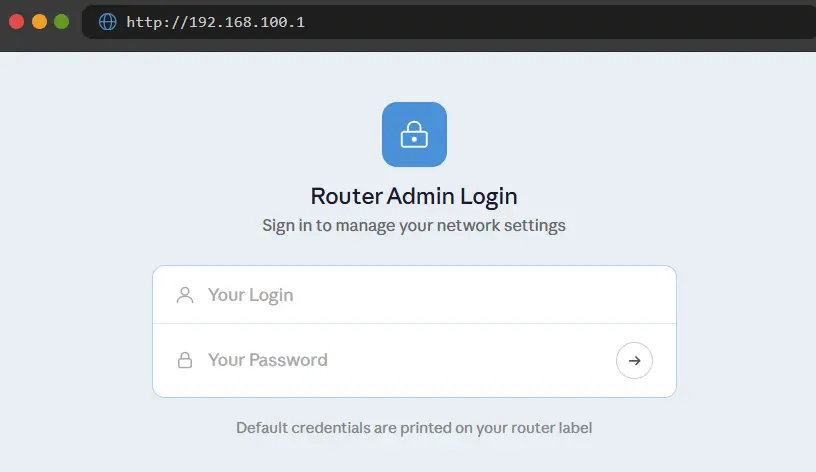
Typing 192.168.100.1 into your browser’s address bar is all it takes to reach your router’s admin panel. This address is the head of your Wi-Fi network the point through which all data packages flow between your router and every connected device, whether that is a laptop, smartphone, or PC.
| Access Method | What to Type |
|---|---|
| Browser Address Bar | 192.168.100.1 |
| Full URL Format | http://192.168.100.1 |
Without this address, your devices can still connect to the internet, but you lose the ability to customize how that connection works. Think of it as the local command center that only people on your network can reach, especially when accessing the 10.0.0.1 Admin panel to manage your router settings.
Default Logins for 192.168.100.1
When you land on the login page, you will be asked for a username and password. Most routers ship with simple default credentials. Here are the most common ones:
| Frequency | Username | Password |
|---|---|---|
| 20% | admin | admin |
| 20% | admin | password |
| 15% | user | user |
| 15% | root | root |
| 10% | admin | motorola |
If none of this work, try these additional combinations:
- admin/0000
- user/user
- root/12345
- support/support
Still no luck? Check the sticker on the back of your router it usually has the username and password printed alongside the manufacturing number. If the router is second hand and credentials have been changed, a factory reset will bring everything back to default, which is especially helpful when configuring Piso WiFi setups for the first time.
192.168.100.1 Login Easy Steps
Getting into your router is straightforward. Here is the full process from start to finish.
Step 1: Find Your Router IP Address
Before logging in, confirm that 192.168.100.1 is actually your router’s IP. Here is how to check on each platform:
- Windows: Open Command Prompt or go to Network and Sharing Center look for the Default Gateway entry
- Mac: Go to System Preferences → select your network → router IP appears next to “Router”
- Mobile: Connect to Wi-Fi → check Advanced Properties for the gateway IP
- Online: Search your router brand and model to find its default IP
Step 2: Connect to Your Router
- Use an Ethernet cable for a stable connection on a laptop or PC
- Wi-Fi works fine on a smartphone or tablet
- Open Google Chrome, Mozilla Firefox, MS Edge, or Safari
- Type http://192.168.100.1 into the navigation bar not the search bar
- Press Enter and the login page will load
Step 3: Enter Your Credentials
- Type your username and password on the login page
- Click OK or Login
- Once inside, change the default credentials immediately to secure your network
Step 4: Troubleshooting
If something goes wrong after making changes:
- Write down your current settings before changing anything this gives you a fallback
- If the router stops responding, hold the reset button at the back for 15–30 seconds
- This reboots the router and restores factory default settings
- Log back in using the original default credentials and start fresh
Step 5: Resolving IP Address Conflicts
If you have multiple routers on the same network all using 192.168.100.1, you will hit a conflict you may end up on the wrong router’s page or lose access entirely. The fix:
- Assign a static IP address to each router
- This keeps every device unique within the network
- It also adds a security layer since a non-standard address is harder for hackers to target.
Private vs. Public IP Addresses
Your router carries two IP addresses at the same time, and understanding both helps you manage your network better.
| Type | Assigned By | Visibility | Changes? |
|---|---|---|---|
| Private IP (192.168.100.1) | Router | Local network only | Fixed |
| Public IP | ISP (from IANA range) | Visible to websites | Changes on reconnect |
The public IP is what websites see when you browse the internet. It can reveal your physical location and expose sensitive data, which is why many people opt for a VPN.
Check if your router has a built-in VPN option many modern devices do. If not, fee-based VPN services are widely available and provide a stable, secure connection to the World Wide Web, especially when accessing your router settings through the 192.168.0.1 Login Admin page for better network security and control.
Finding Your IP Address
Not sure if 192.168.100.1 is your router’s actual gateway IP? Here is how to confirm it:
- Check the router label: most manufacturers print the local IP on a sticker at the base of the device
- Check the user manual: the default gateway is always listed there
- Windows users: click the network icon at the bottom right of your screen → open properties → find the IPv4 tab → the gateway IP is listed there
- Mac users: Apple menu → System Preferences → select your network → gateway IP appears next to “Router”
- Visit the manufacturer’s website: search your model if the label is missing
If your device label says 192.168.100.1 but your system information shows something different, someone changed it likely your ISP or the previous owner. A factory reset will always restore it back to 192.168.100.1, which is especially helpful when trying to access the NETGEAR Router Login page with the correct default settings.
Configure Your Router With 192.168.100.1
Once you are logged in, the dashboard opens up a full range of settings. It can look overwhelming at first, but start simple:
- Go to the General Settings Menu
- Find the Router Password field and enter a new password
- Update the username field as well
- Hit Save
These two changes alone significantly improve your network security. And if you ever misconfigure something, everything can be restored to default with a single reset so do not be afraid to explore, especially when managing devices like a Huawei Mobile Hotspot to keep your connection secure and optimized.
Changing The Local 192.168.100.1 IP Address
Changing your local IP from the default 192.168.100.1 makes your router harder to target and keeps your network setup unique. Here is how:
- Open the Setup Menu
- Go to Network Settings
- Find Router Settings
- Enter your new local IP address
- Click Save
One important note once you change the local IP, the interface will no longer be accessible at 192.168.100.1. Write the new address down before saving, or you will need a reset to get back in, which can also affect your Download Speed if the network settings are not configured correctly.
Changing The Name Of The Wi-Fi Network
Personalizing your Wi-Fi name (SSID) helps your network stand out and makes it easier to identify, especially in areas with many nearby networks. To change it:
- Open the Setup Menu
- Go to Wireless Settings
- Find the SSID field and type your chosen network name
- Click Save
For an office, using your company name as the SSID is practical. For home use, you can go with anything you like. While you are in this section, set a strong Wi-Fi password this stops anyone without the password from using your connection and is the foundation of good wireless security.
Depending on your router’s make and model, you may also find options for:
- Setting up multiple networks
- Configuring a built-in VPN service
- Managing which devices can connect and how
192.168.100.1 IP Address Uses
The 192.168.100.1 address gives you admin access to your router and opens the door to a wide range of configuration options:
- Set and update your username and password
- Adjust DNS settings for faster or more secure browsing
- Configure your network layout and security
- Block hackers from gaining access through weak default settings
- Manage connected devices and control bandwidth
Most people only ever use the default settings, but even a few small changes here can make a noticeable difference to both performance and security.
Why Would I Want to Log in to a 192.168.100.1 Router?
There are plenty of good reasons to log into your router beyond just the initial setup. The most common one is Wi-Fi performance. If websites are loading slowly in certain parts of your house, the problem might be channel overlap neighboring networks broadcasting on the same frequency band as yours.
A Wi-Fi analyzer like NetSpot can help you identify this, and once you know which channel is congested, you can log into 192.168.100.1, switch to a better one, and see an immediate improvement.
Beyond that, your router’s interface gives you access to features most people never touch:
- Malware and spam protection
- Guest Wi-Fi access
- Virtual LANs and multiple SSIDs
- Port forwarding
- Parental controls
- Remote management
- Quality of Service (QoS) prioritize traffic for gaming, streaming, or video calls
Once you start using these, going back to default settings feels like leaving a lot of potential untapped.
What Other Devices Use the 192.168.100.1 IP Address?
While 192.168.100.1 is most commonly associated with routers, any network-connected device can technically be assigned this address. Within a single network, only one device can hold it at a time but across multiple separate networks, it can appear on countless setups simultaneously without conflict.
Advanced routers let you take full control of the private address space:
- Define the entire subnet and allowable IP range
- Assign a fixed IP to the router
- Control which addresses are handed out on-demand to connecting devices
Network administrators often run into situations where 192.168.100.1 refers to a server on one network and a printer on another. To avoid confusion, they switch to a different subnet entirely. For home users, this level of control is rarely needed but it is useful to know the flexibility exists.
FAQs About 192.168.100.1
Arif Khan 
Hi, I'm Arif Khan, a qualified Engineer with over 6 years of experience working with router and networking companies across the Philippines. I created 10001loginph.com to help everyday users navigate online platforms with ease and confidence. Alongside my engineering background, I'm also a passionate SEO Expert and Content Writer dedicated to delivering accurate, simple, and reliable digital guides. My goal is simple to make the internet easier for everyone, one guide at a time!